
When working with data that is tabular, it's often the case that you need buttons or widgets to view, edit or delete a row or record. Viewing and editing is relatively easy. A common tactic is to create a button at the end of each row with a unique id, then attach a 'click' event handler using JQuery.
The HTML could look something like this:
<td><input type="button" id="edit-button-32"/></td>
I'll leave the details of how you assign a unique id to an element by looping through a record set from a table for another time, but suffice to say, it's easily done with a few lines of code.
The JQuery to attach the event could look something like this (note the use of `JQuery` to comply with the Wordpress rules):
// Row/Record Edit Click jQuery('[id^="edit-btn-"]').on( "click", function() { id = this.id; // strip the first part of the element id to leave the numeric ID id = id.substring(9);window.location.replace("https://somesite.com/index.php?action=edit&id=" + id); });
This snippet says 'find all the elements whose id begins `edit-btn-` and attach a click event handler that reloads the page, passing the element's id as a parameter in the URL'.
You can do the same for Delete buttons - instead of passing action=edit, you'd pass action=delete or similar. Naturally, you want some kind of delete confirmation. Careless clicks cost lives! Possibly the simplest option is to use the browser's built in Javascript alerting methods. For example:
if (window.confirm("Are you sure you want to delete this record?")) { window.location.replace("https://somesite.com/index.php?action=delete&id=" + id); } else { window.location.replace("https://somesite.com/index.php"); }
This is a bit industrial though - no ability to style the dialog and modern browsers have become quite suspicious of sites that use a lot of popup alert dialogs.
A better way is to use a CSS overlay. There are a multitude of overlay plugins for Wordpress. I looked at three or four but none of them have the functionality needed i.e. to trigger a modal overlay with a JS event from multiple buttons on a page, each with unique id. The solution came in the form of an excellent modalBox script from CodePen.
In my case, I only needed one type of button (confirm) but it was easy to modify Donnie D'Amato's script to do that.
All I had to do was extend the options to include url and query_string :
jQuery(document).ready(function($) {
jQuery('[id^="del-btn-"]').on( "click", function() { id = this.id; id = id.substring(9); var opts = { type : 'confirm', content : 'Are you sure you want to delete this record?', url : "/index.php", query_string : "?action=delete&id=" + id }; var modal = modalBox(opts); });
I made a very minor change to Donnie's modalBox function:
cancelAction : function(){}, // Here's where the action happens confirmAction : function(){ window.location.replace(args["url"] + args["query_string"]); },
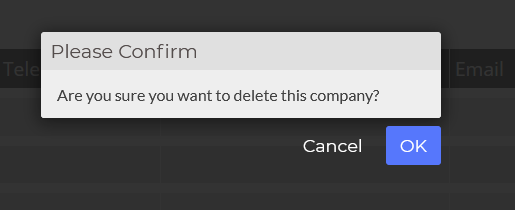
The modalBox CSS and JS take care of the rest and you get a very smart-looking modal confirmation box.
I had been round the houses a bit on this one so it was great to hit on such an elegant solution. Hats off to Donnie.
You may have questions about writing custom Wordpress templates to connect to a MySQL data store, perform CRUD operations and leverage Javascript and JQuery in your front-end.
I'll try to do another blog post on that topic, as it's also a bit of a journey. The trick with Wordpress and JQuery is to load your scripts in the functions.php file, something like this:
function my_theme_scripts() { wp_enqueue_script( 'my_script', get_template_directory_uri() . '/js/my_script.js', array( 'jquery' ), filemtime('/home/site/public_html/wp-content/themes/theme_name/js/my_script.js'), true );}add_action( 'wp_enqueue_scripts', 'my_theme_scripts' );
If you're wondering about the filemtime(), that's to ensure that WP doesn't cache the script during dev time. Once you go live, you can replace it with a version string like '1.0.0'
Hopefully, unlike me, you won't waste hours wondering why your JQuery isn't being executed or changes applied.